A week or so ago I ran across a time lapse video of how to make paper bag stars inexpensively, for decorating if you have any events like baby showers, bridal showers, kids birthday parties, etc.
I didn't think of this idea on my own, although I did have flashbacks of making paper snowflakes when I was a kid. If you Google the idea you will find more than one video.
The stars looked fun to make, and were certainly simple enough if you had a glue gun and a sharp pair of scissors.
Not everything I make from the internet turns out, and not everything is as simple as it seems in a video.
These paper bag stars were, and they get a two thumbs up.
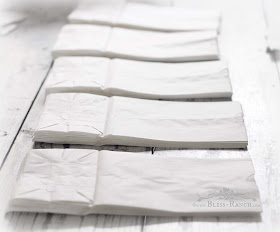
I purchased a package of white lunch sacks for just under two bucks and divided them into piles of seven.
We were able to make 7 large stars with two bags left over.
The bag said it contained "50" sacks. Lord knows I'm no mathematical wizard but some how that math was off.
One of my daughters wanted the task of making the stars and she followed the original instructions to the T.
The bags are lined up bottom part at the top, and then a big T is made with the hot glue.
One line across the length of the top (bag bottom), and the other down the center to make a T.
Then you lay the next paper bag on top of the glue and press them together.
The glue is very hot even through the paper sack as discovered with a gasp by daughter #2, so be careful. We used a high temp glue gun with appropriate glue sticks.
Continue to make a glue T on each bag and attach one sack after the other until all seven are glued together and you have a glued stack of bags.
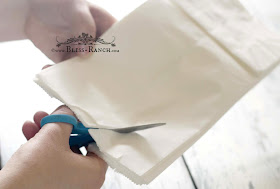
If you have a better junk drawer than we do, find yourself a pair of sharp scissors that actually can cut easily through that stack of paper bags.
Our scissors worked, barely, and what we should have done was put the bags in the paper cutter. Duh, too late now.
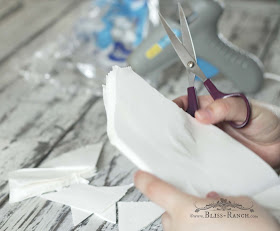
You will make a point by cutting off both of the sides of the bag.
We learned it doesn't have to be perfect.
Do you see those kindergarten scissors she is using in the photo above? That's sad when those are one of the two sharpest scissors you own!
To make the stars come to life you make one last T of glue and open them up fan style end to end.
The ends of the stars will be open all along the inside where the two bags come together. This makes them fluffy.
The stars measure 21 inches from star tip to star tip.
Large enough to make a nice size decoration hanging from a ceiling.
I picked up similar small red ones at the dollar store, tiny in
comparison, two in a package so that makes the small dollar store ones fifty cents each.
I thought the price was right on the paper bag stars we made.
Seven large stars and enough extra to carry a bag lunch twice.
Approximately .28¢ each.
So in less than fifteen minutes we had seven large stars for under two bucks.
And then my daughter started to experiment.......


Those are fun! Pinning!
ReplyDeleteOh, this SO reminds me of grade school when we folded paper and cut out snow flakes!
ReplyDeleteBrenda
I made those, it's fun!
ReplyDeleteSo cute! I love how festive they are (and inexpensive).
ReplyDeleteNeed to try these!
ReplyDeleteI saw this video and thought it looked like so much fun and so simple. Thanks for sharing your version and for letting us know that it really DOES work. Love them!!!
ReplyDeleteKits, cats, sacks, and wives...how many were going to St. Ives??
ReplyDeleteYou make cool schitt.
-andi