I love Fall, hands down it's my favorite season, but it also means that when it's over, frigid temps and cold wet slushy snow are soon to be bestowed upon us.
So before the cold stuff falls from the sky we wrap up outdoor projects, and round here there isn't any DIY we won't attempt at least once on our own.
Sometimes the projects work out, sometimes they don't, and I have resigned myself to the fact that no matter if a project might or might not turn out, it will always take longer than anticipated.
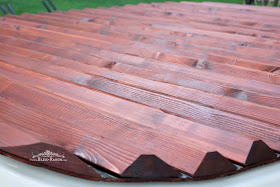
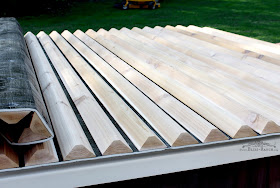
Such was the case of a patio project we started in early summer after we received a new cedar wood spa cover from Canadian Hot Tubs.
The new cover looked mighty fine and the brawn of the operation decided he wanted to try his hand at sculpting some stones from cement to jazz up the outside of our typical spa surround.
Personally I thought it would be really swell to just go to the quarry and have a few boulders hoisted onto a trailer and drive them home, but I guess that would have been doing it the easy way while taking the cash out of his wallet.
Thinking on it after the fact many years later, with our home being surrounded by woods, we probably should have considered a rustic cedar hot tub nestled in the towering trees so we could be totally immersed in nature as we took a soak.
But half the year the walk to that soak would mean using snow boots and carving out a path in the snow, and well... it's cold here in January and we wanted to actually soak in that hot tub on a sub zero night, not admire it from a window.
So our spa was placed on re-enforced concrete right on the patio, just a hop skip and a jump from a door. We can even walk barefoot on a cold night, albeit the walk is often brisk!
When the old cover went to heck, we quit using the spa for a couple years. The new cover simply rolls up, plus it's easy on the eyes and on tired old muscles. You can read all about the cedar cover that got us back in hot water {here}.
Thankfully she didn't break anything but there was wounded pride as she literally spun around on her back on the hard icy snow like a toy sit and spin....in all the glory of her bathing suit. Yeah, I hope to never have all eyes on me laying on the frozen ground in my swim suit.
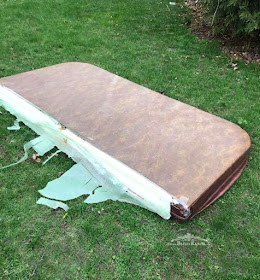
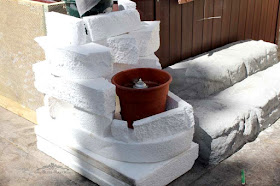
To start the sculpting process the old spa cover was taken apart to get at the nice foam innards, which were still intact and usable if you were in the market for a hunk of foam.
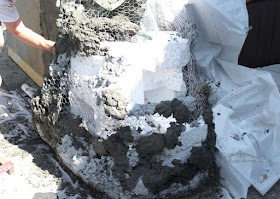
The thick very dense white stuff you see below was cut up from the inside of that spa cover and recycled into the forms for the steps.
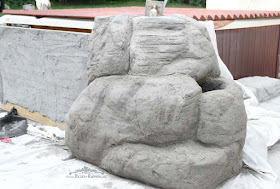
The forms were shaped with chicken wire, and received several coats of cement smeared on by a gloved hand.
The sculpting process didn't happen quickly.
Besides having rain at least one day of every weekend at the time, as Michelangelo would tell you, sculpting just isn't a speedy endeavor.
The fake rocks are not connected to the spa. The brand tub we have has access panels on three sides, and the two that show toward the house are the ones that need to be accessed the most, so that had to be taken into consideration with the design decisions.
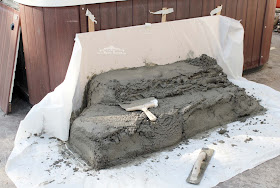
Brawn started with the steps, mixing the cement and water in his wheelbarrow.
The sculpting halted when the weather didn't jive with free time and it stayed this way for quite a few weeks.
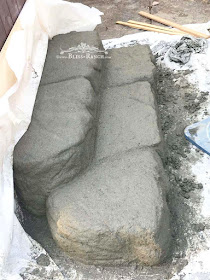
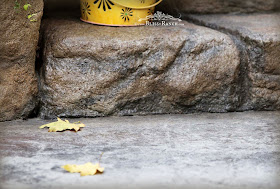
Here is a shot of the steps after they cured, were stained, and sealed....
When the weather and free time finally coordinated, a corner was shaped with the foam as well as a shorter stack to the right so the steps would be flanked by the fake boulders.
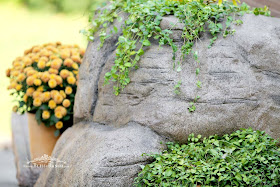
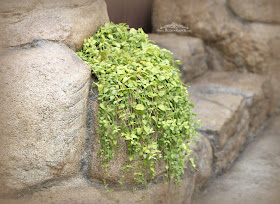
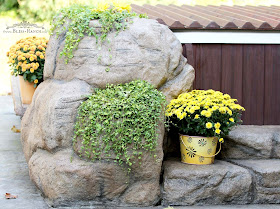
An empty flower pot was set on the foam just to get an idea of the location for the two carved out areas where real or artificial plants could be placed inside a hollowed out spot.
A drain system with an old piece of hose was added under the cement so rain water won't fill up the open spots and water can't pool and freeze over winter.
By the time we were ready to put plants in those spots it was the middle of July, and what living plants I had to pick from at the nursery was slim. The bonus was these vinca vines were on clearance. Next year I might just head to Michael's Crafts and pick out some artificial greens since I don't have a very good track record of keeping plants alive all season.
On the side of the tub where the most access is needed to get at the pump and inner plumbing, the whole area was bumped out and a wood shelf was placed on top.
The shelf doubles as a spot to set patio snacks or beverages while soaking.
The wood top unscrews and a person can maneuver inside that area to check the fittings and gaskets as well as access the pump and electronics. The actual panel attached to the spa can be lifted out of the way after the wood top is unscrewed. On the other side the steps are low and the panel unscrews and also pulls out of the way.
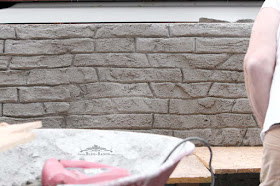
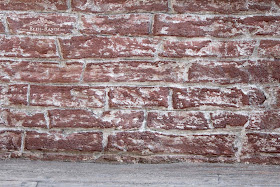
The front of our house is brick so to break up the rock design a brick pattern was gouged into the cement.
The cement was then stained with several colors till it looked like a weathered brick.
After a trip to a local restaurant with an old white washed brick wall inside with the restaurant name, I thought, hmmmmm.... I could do something like that to the fake spa brick. So as a final touch I have something planned with lettering, I just need to decide what I want the lettering to say. I'm considering the words thank God this is finally done.
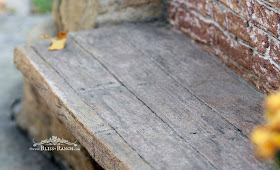
Since we always need more seating around here, a reinforced concrete bench was formed along the front under the brick. The bench has texture, lines and dark nail spots to mimic wood planks.
The bench is used for setting butts on, flowers on, towels on, and for standing on if you're a little kid and want a more adventurous way to climb into the water. It's also a good spot for dry folks to sit to visit with the ones in the water.
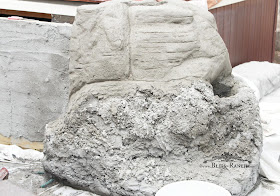
The secret tool to give the cement its overall texture is nothing more than a plastic bag all scrunched together and dabbed on and off the wet cement.
Shaping and hand tooling give the cement the look of a boulder, along with various colors of concrete stain to add shading, then lastly the whole thing received a coat of sealer, and the rocks were complete.
Below is a closeup of the texture from a simple plastic shopping bag and some hand sculpting with the edge of a trowel.
Now I won't suggest you do this as we did. There are probably better ways to have fake rocks, or of course you could opt not to go the DIY route and call a landscaper who will get you some boulders that will somehow fit where you want, and charge you a pretty penny to do so.
Our way had to be cheap with ingredients that were readily available. Or free like the foam in the old rotten spa cover.
We've got two sides of the darn thing done, and the last two sides won't involve any cement and can wait till spring.
When next you see the fake brick it will be sporting some sort of a graphic or lettering. I'm in the mood to tackle that, but of course rain is predicted all this week, and likely by next week that mood will have passed. But Spring comes after Winter, which I know is coming after Fall.

Quick Links:
Get your own Cedar Spa Cover at Canadian Hot Tubs









Wow this amazing! Our spa will never get this treatment, I'm sad to say but I'll tell it about yours!
ReplyDeleteYou guys are amazing. What talent. Thanks for sharing, but I know I could never do that.
ReplyDeleteBlessings,
Audrey Z. @ Timeless Treasures
It looks great, and I think you should write how you feel...so Thank god this is finally done is perfect.
ReplyDeleteWow. What an amazing job...I am seriously impressed! Looks great!
ReplyDeleteYou guys are as crazy as I am Bliss! But this project looks fantastic. I hope Brawn is proud of himself. And I hope you have a cute swim suit. After all that work, you better be planning on some serious soaking.
ReplyDeleteThe Other Marian
This is by far one of the best faux stone and brick projects I've ever seen!! The built in planters take it over the top. It's a hot tub paradise. You guys did an amazing job!!
ReplyDelete