Thursday

Christmas in July Party Features


I've been late to a blog party a time or two.

I've even shown up to a party on the wrong day in real life. 
Yeah, that was reallllyyyy emmmbarrrrasssssingggg.......

And forgetting about features for the link party that I co-hosted with the wonderful Angie at Knick of Time and Betsy at My Salvaged Treasures, well ummm, yes I forgot that too.  Bad Bliss.

I will make myself wear the cone of shame.  Again.

Apparently I am a habitual-party-feature-forgetter because last time I co-hosted a holiday link party I forgot the feature part too!  What the heck Bliss? 

I'll just steal this photo from my own post from the last time it happened, and try to be good from now on. 


Thank you to everyone for linking up.  I've got three links to feature and they are all projects I can see myself making.  I have a love hate relationship with feature picking..... I love picking my fav's, and I hate that I can't pick fifty.

Mel from Mellywoods Mansion transformed a rubber rain boot into Santa's boot.  I love it - it's cute, simple enough I can do it, and there is no mistaking whose boot it is.


How about some sweater trees?  The possibilities are endless for these, but I like the simple sage green and the button details.

Tammy from One More Time Events can show you how to make trees from sweaters.  And that's the part I like the best; just like Santa's boot, I can make these.

A Minnesota sweetheart, Laurel from Chipping With Charm, made the best advent tree ever out of vintage baubles.  And she kept it in line with the reason for the season.


(This is an appropriate time to say in my very best Buddy the Elf voice - "I know her!".)  Yes it's true I have met Laurel, which means she might be able to pick me out of a lineup.

That's the three features, but now because I'm a rebel I have just oneeeeee moreeeee....

Fiona from Just Paint It White didn't want to let me down by not coming to the party, so not only did she create something I love, she basically dedicated her post to talking smack about me. 

Fiona and I go way back, back to my very first week of blogging.  You know when bloggers get huge and famous, well I always joke with them not to forget the little people.  It has nothing to do with blog size, but Fiona is my little people, I will never forget her.  Too bad I'm not huge and famous then millions would also flock to meet Fiona (sorry 'bout that Fio).

Fiona took apart a veggie crate and made this star with Merry Christmas in different languages.  Great reuse for a little crate, and I love that she used different languages.  Not too bad an entry from a lady talking smack about me!

I will be good.
I will be good.
I will be good.


Follow on Bloglovin

Saturday

Bliss's Beat the Heat Whipped Cream Topping

Sometimes a Bliss experiment turns out right.

Like my Fruit in a Jar.
I usually make fruit pizza, so why not put it in jars right?
Everyone else does.

I bet you're thinking 'yeah so what Bliss, I've seen fruit in a jar a million times' and you're asking yourself what makes my fruit in a jar different than any body elses?
Heck if I know, I've never had theirs, so let me tell you how I make mine......

It's all in the cream.

The family looked at the jars and said "what's this?".  The tone they used made me think they didn't mean the food inside the jars,  I think it was more like "what's with the jars?" with an undertone from the males of "you crazy woman".

The crust.
I don't use a cookie crust like the original recipe calls for.  Too sweet and crumbly for my taste.  I use The Dough-boy croissants in a can. 2 tubes for 12 jars.  I lightly sprinkle it with powdered sugar before I bake it, not too much, just enough so it doesn't taste like bread.

Hand shape the croissants out flat in a pan, cookie sheet size is fine, oven time a bit less than what's on the tube, and watch them so they don't get over done.  Take them out when light golden brown, cover to keep moist and let them cool, then slice them up into crouton size - I used a pizza cutter.

Fruit.
Start with fresh fruit.  The kind of fruit doesn't matter, get what your family likes.


For these jars I used 7 fruits:
Mango, Kiwi, Nectarine, Banana, Apple, Strawberries, and Blackberries.  
I tossed the banana in fresh squeezed lime juice so they wouldn't get brown.

In the past I have also used oranges, pineapple, blueberries and grapes.  It's all good.

The Cream.
According to my husband the most important part is the whipped cream.  Outside in the heat, even sitting in ice, regular hand-whipped-honest-to-goodness-whipped-cream breaks down and soon you are left with fruit in thick sweet milk.

Make these ahead, and chill in the fridge first if you are taking them outside in the summer.  Outside I kept ours on ice for a couple hours before we dug in.

I had to come up with a cream recipe to please more than just myself.
Not too sweet, had to have the real whip cream flavor, couldn't break down under the weight of the fruit or the days heat, and had to taste good to the toughest whip cream critics at my house.


Bliss's Beat the Heat Whipped Cream topping:
1 container of cool whip
Real Whipping Cream that you have to get beaters out to make
1 Brick of Cream Cheese
Powder Sugar to taste and add as your are whipping
Mix the softened cream cheese and cool whip till smooth with a hand mixer.  Then start adding heavy whipping cream.  I'd say for the 12 jars I probably added 4 cups.  I didn't really measure, just stuck my finger in till it tasted like whipped cream and not cool whip.
Whip it till it's sturdy.

The cool whip and cream cheese give it a smooth but firm texture, and how much powdered sugar you use is a personal preference.  We like to taste the cream so I make mine just slightly sweet so it doesn't over power the sweetness of the fruit.

To put the jars together:
I dropped in the crouton sized croissant crust pieces, fruit, cream, repeat, ending with cream topped with fruit and croissant pieces.  It was light, yummy, and importantly, it held up outside in the heat.

One son liked it so much he took an extra home with him.
The one in the blue ball jar.
I sent him a text letting him know I want to keep the blue jar so bring it back some time.

Think I'll ever see it again?

 Simple strawberry & blueberry trifle with blueberry pound cake
and Bliss's Beat the Heat Whip Cream
Keep cool and your whip cream too!


Follow on Bloglovin

Sunday

Christmas in July Link Party


Sleigh bells ring are 'ya link'n


There is no snow flakes at this Christmas in July party and I'm pretty happy about that!

Monday, July 15 - Saturday, July 20
Link up to 3 holiday ideas, whatever it might be
With me, BlissRanch, or Angie @KnickofTime, &  Betsy @MySalvagedTreasures

Hint - I only make my Christmas treats at Christmas, but I like to eat your treats all year long!  I will be paying particular attention to things I can make as gifts, edible or otherwise.  Crafts, junk turned to treasures, pieces of vintage Christmas, you name it.

It's fine with the party hostesses if you don't have something new to share, remind us of something you made in the past (caramels and fudge sound good right now).


If you missed my last post, here is my Christmas in July project......

Be a deer and read about these cute sleigh pullers {here}.

And Angie was running around with scissors - I'm telling her mother - but look at the cute book page garland she made....

Grab your scissors and stop over at Knick of Time.

Betsy had a paper project too.  And paper comes from trees and logs, so my deer could be made into Angie's or Betsy's project right?

Check out this vintage sheet music tree Betsy made.  
I will be making some as gifts, I love it!  
I should probably start now.

Betsy put the whole frame together too over at MySalvagedTreasures


So whatcha got?
  
Put on your winter parka, 
plop an ice block in front of the fan, 
and get your Christmas in July going!


Follow on Bloglovin

Friday

Log Reindeer...in July

Two months ago there was snow in my yard.  We had the winter that never wanted to end.  Then we had the monsoon season, or at least it seemed like it with days of rain.

Bliss-Ranch.com Log Reindeer

So now that summer and beautiful weather has arrived, lets have;  
because when it's hot outside 
having my yard turn into a giant sno-cone doesn't seem all that bad.

There is one project that I start for the holidays well before the snow flies.  Every year Brawn and I make log reindeer for family and friends.  Brawns Uncle Tony was the inspiration about 20 years ago.  He made fairly good size deer then strung lights on the antlers and one year he made some small ones for us to hang on the tree.

Uncle Tony's Mini Deer Ornament
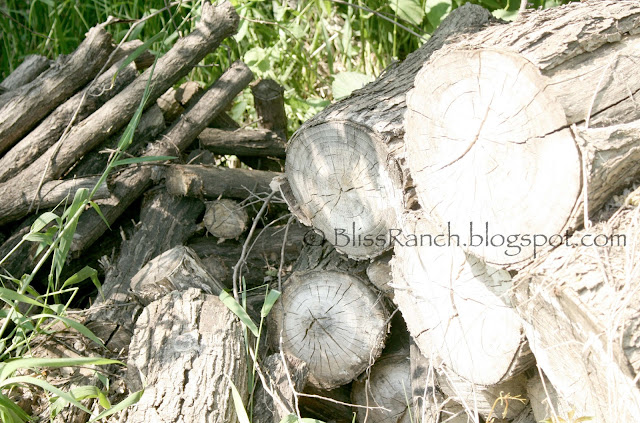
That started my obsession with making them as gifts, plus we have plenty of the raw material laying around.

Future Reindeer
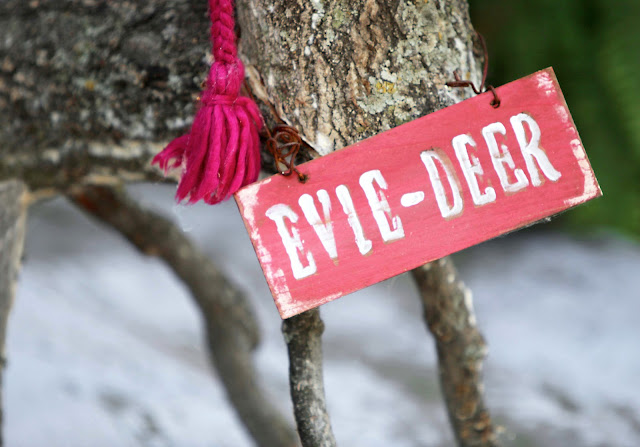
One Christmas Eve some "deer" friends of ours went to church and while they were gone we implemented operation "Not Tonight Deer".  The covert operation involved quietly placing "Oh Deer" and "Yes Deer" on their walk way to welcome them when they arrived home.  Brawn and I thought we were pretty darn funny.


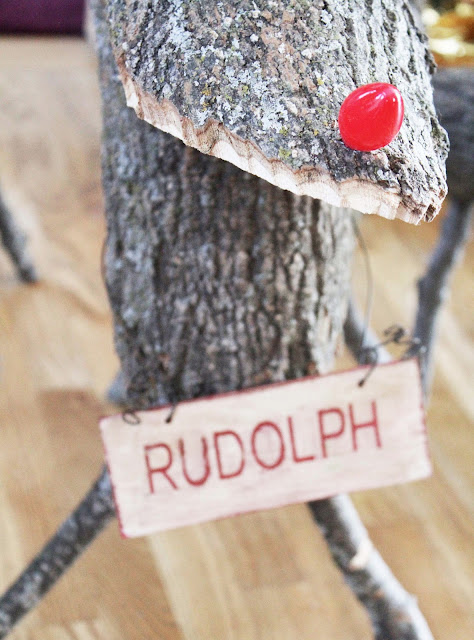
Over the years we have made lots of Rudolphs, and every one looks different.  The newest ones were made for each of the Grand kids with their names.

No I do not have a grandson named Rudolph.

Log Reindeer

 Our original deer had big wiggly eyes, but those didn't hold up so well in winter, and neither did their faux white fur tails.  And more than a few red noses have smashed to the ground.

Log Reindeer

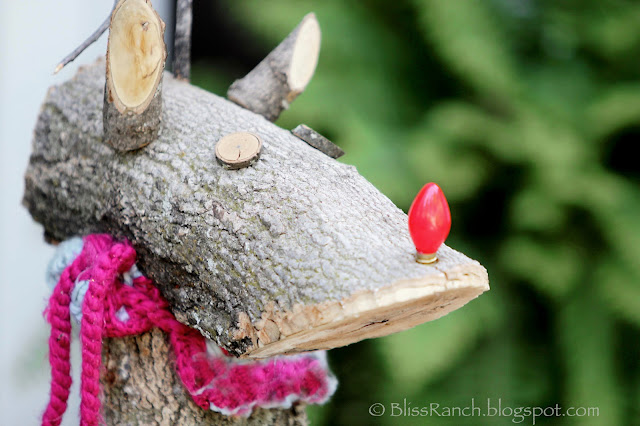
Now we make most of their body parts out of wood.
Brawns in charge of the main body, tails and ears, I do eyes, antlers, legs and finishing touches.

Log Reindeer

They get a coat of glitter so they sparkle in the snow and some get jute with bells, some get scarves.

Log Reindeer
 The scarf on this deer was an old knit hat with pom poms that I cut up.

Antlers are usually better looking, 
but there are mosquitoes out in antler making country right now.


Log Reindeer
These ones are out to pasture.  Winter is hard on deer.  The one on the left is bark-less - Brawn made it that way.  These will get all cleaned up with new noses and scarves, fresh antlers, missing legs replaced, and they will line our walkway in December.

Log Reindeer
 The deer Uncle Tony made had noses that would light up.
Ours do not.

The Christmas in July party starts on Monday the 15th, so I hope you'll stop back in and link up something festive with Angie, Betsy and I.   Till then, stop over and see what Angie at Knick Of Time and Betsy at My Salvaged Treasure have created.  I'll give you a hint.... I am pinning both and making both in December.

 As for my Christmas in July Reindeer, it will go live at our oldest son's home in December.

Log Reindeer Bliss-Ranch.com


Follow on Bloglovin

Tuesday

Clever Hideaways HomeTalk Board


When I made this mosaic table I did it because I was bored.  Or maybe it was because my daughter worked at a stained glass shop and brought me home all the scraps?  Or maybe it was because the last glass table we had by the pool blew over in a storm and shattered into a million pieces?


No, I don't think it was any of those things, I think it was because I can't pass up something for a buck.....and because we didn't have one anymore due to that storm.

Kids need a place to sit to eat ice cream right?  My momma told me 'ya can't eat it in the pool.   She never bought me funny goggles though, so I hope that makes up for not letting them eat ice cream in the pool.


The table mosaic was made well before I knew what a blog was.  Just picture a typical glass top patio table with an umbrella.  The only difference is that mine cost a buck at a garage sale.

I thought I was pretty clever using scraps of stained glass shards and attaching them right to the table top with clear silicone.  They were grouted in and the table tripled in weight, never to be blown over again.  It is going on it's 6th year.

I can't say the same for the umbrella though.


Then I thought I had another clever idea - to make a two sided mosaic screen to hide our air conditioning unit, which was as ugly as every other air conditioning unit I have ever seen, problem was that ours was smack dab in the corner of our patio.

Remove the air conditioning from my house or disguise the unit?  Guess you know how that turned out.

One clever idea led to another and I posted the clever hideaway on HomeTalk where some of the commenters made sure I had it the proper distance from the walls.

Everyone's an expert 'ya know?


But mostly folks thought it was a pretty way to hide the ugly air conditioner.  I made the disguise the same summer I made the table.  I must of had a lot of spare time that year.

This summer I spend some of that extra time snooping around on HomeTalk for ideas.   

And I guess because that air conditioner screen is so clever, HomeTalk thought I would recognize other clever projects and asked me to curate a board of clever hideaways. 

Click the image to head on over to HomeTalk
Top left to right:
1. A clever outdoor shower.  2. Air Conditioner Screen.  3. VERY clever watering system with hidden hoses (this one is on my list to do).
4. A disguise for your TV cable box.  5. Hide modern gadgets in your vintage style.  6. Burlap bag hides a 5 gallon bucket.   7. Big dog = big dog food bags.   8. Fire pit table for when it's hot, not when it's not.   9.  Got craft paint?  Make a door.   10. TV Screen Screen.   11. Breadbox Charging Station hideaway.   12. Award Winning wall vent cover.

13.  There is no 13 here it didn't fit.  So click the image and see the clever way a drop down ceiling was replaced with bead board.  In fact, while you're there click on all 12 of the clips to see just how clever those hideaways really are.  You don't have to have a blog to visit HomeTalk.  HomeTalk is a social hub powered by user generated content.  It's a great place to find DIY projects of all kinds, inside the home and out.  If you need tips or have some questions you want answered, or just want to browse for ideas, HomeTalk is a spot you should check out.

                                                             
And someone will always let you know just how far you should have your air conditioner screen from walls and mosaic hideaways!


Follow on Bloglovin

Monday

Replace Playground Canopy with a Wood Roof

When a family with six kids lives someplace long enough, stuff eventually wears out.

That would be true for the canopy on our Rainbow Play System.  The playground has seen a lot of action and the red, yellow and blue canopy was ripped and shredding.


Some of the corner flags had broken off due to the fact they were used for many a game of capture the flag.


Trying to find a replacement canopy for our model number was harder than I thought.  Do you think I could find one?  Of course not.  I did find the knock off's that say they will fit, but considering I never really liked the original colors all that much I didn't want to pay $75 dollars for one that looked like a tarp.


I inquired of the man with the saw if he thought it would be easy to update it with a wood roof.  Nothing fancy and I didn't want it to take till Fall to complete.  No problem he said.


Instead of a solid color I wanted to do the boards like the porch bench he recently made, each one different.


We started out with 3/4" boards of various widths - 3 widths to be exact.  Brawn cut them to size and made the bottoms sort of rounded like an awning.


Next we lined up all the paint cans from the garage and a bin of dollar store paint brushes and I picked whatever can was closest and started painting boards.

I ended up using a brown, a dark gray, green, cream and that awful purple/pink color that went on the dresser bar.  Once it's wiped with dark stain it looks a deep wine color and I can live with that.

Bright Purple/Pink color after it is washed with dark stain

After the boards were done they were all bright and newly painted looking.  And I didn't like that look.  See how that purple/pink color looks before the dark stain wash - YUCK!  I used my favorite dark Olympic Stain for the wash to age them and tone each color down.


Some rain came through and changed my plans to put several coats of marine varnish on before installation, so this week I'll be finishing that up. 

First the nail gun was used to tack the wood on, then the crossmembers were added on the underside and it was all screwed together.


I love how it turned out.  For half the price of a canopy top we have a roof that the wind won't be able to blow off.


The only thing left was some new flags.


Last summer I picked up a bunch of leather sample pieces at a garage sale for a dime each.  I painted some dowels I found hiding in the garage, cut the flags, stapled them on the dowel, and screwed one on each corner.  I love how those turned out too.


I wonder how many folks have leather playground flags made from furniture fabric samples?  They won't last forever and eventually I will have to make some bigger better ones, but for this summer I'm calling it complete.

After with new wood roof

The to-do list is slowly but surely being picked away at.  I think it only has 50 chores left on it.  I noticed we never put the third swing back up after the baby swing was taken off last summer.  So make that 51 chores.


Linking the Playground Roof Replacement up at:
Freaking Awesome Friday @MellywoodsMansion
It's Party Time @ThreeMangoSeeds
Homework Wednesday @TheEverydayHome
All Things Summer @TwoTwentyOne
Craft-o-Maniac Monday@CraftOManiac 
The Scoop @TheFarmhousePorch

Follow on Bloglovin
BB
Disclosure Policy for Bliss Ranch:
From time to time there might be a written review of services or products on this blog for which Bliss Ranch may or may not have received that service or product for free. Receiving a product or service for free or at a discount will never dictate what is written on this blog or guarantee a favorable review. All opinions here belong to Bliss Ranch and Bliss Ranch alone. Bliss Ranch is not monetarily compensated to write anything on this blog... period! For the complete privacy policy please see the tab at the top of the blog.