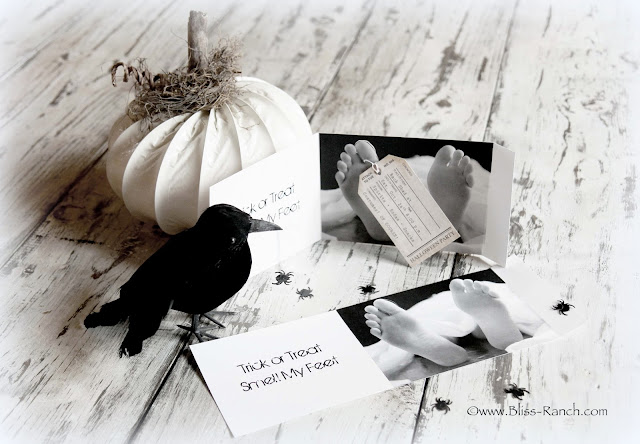
How to make toe tag Halloween invitations, or, I could very easily start this post out "It was a dark and dreary day.....". The sun is not shining, the clouds have gathered and are dropping rain on my parade.
Pisses me right off.
 |
| Tape from Target, Scrap-booking isle |
I had the black and white part of the invitations printed at Office Depot - .18¢ each one sided and I had two on a page. Cardstock. I needed 55 copies. This party has 5 hosts, everyone invites friends and family. Office Depot was better than printing all those copies at home, $10 bucks divided by 5, very reasonable.
And my labor is free, I assembled them all.
Office Depot wanted $1.29 a copy for the tag part, considered "color copy" which has seven on a page. I needed 16 sheets and decided to print those at home on the card stock I already have.
Cheap. Yes that is me.
I can't take credit for the whole idea of making toe tag invitations, but I did have my own ideas for how I wanted mine to look.
First find some feet and a helper to make the foot model laugh while they are suppose to be holding still, because even though there are feet photos on the web, I didn't want to pirate them.
I needed authentic Bliss Ranch feet for my invitations.
My foot model will remain anonymous, because you know she hadn't washed and smoothed her piggies and was basically mortified to have photos taken of them.
It was the foot models idea to use one of my hammered tin platters to mimic feet on a cold metal gurney. I added a black blanket to cover her as well as the headboard on my bed, and an old sheet, then I snapped away.
I ended up with this.....
Because two sided printing costs more, we wanted to keep the lettering and photo on one side, and opted to just fold the info into the inside. The folds all needed to be "scored" in two places, and I did all those suckers myself, but it was worth it because it creates a nice crease for folding.
I used the exacto knife blade-up for scoring, and blade-down for cutting around the big toe. I wanted the tags to actually hang on the toe, I like the 3-D effect.
The most tedious part of this whole process was tying the tags on. I used dental floss, the waxed kind so it was stiff and easy to put through the tag, then a piece of regular tape on the back side to keep the floss on the toe.
They were each folded and sealed with the tape.
Stuffed into envelopes I picked up last spring at a garage sale that was selling office supplies. 250 for a buck, and I sized the invites around being able to fit in those envelopes.
I like how they turned out. I stamped on a spider, because I like to use ink pads. Really I do - I like the sound of the THUMP onto the paper.
The tags have info on both sides. Host names, details on the front, and address and phone numbers for questions on the back.
And "Trick or Treat Smell My Feet"
is just funny.
Treasure Hunt Thursday @FromMyFrontPorchToYours
Halloween Blog Hop @ TheHappieHousie
Wildly Original Party @IGottaCreate
Halloween Spooktacular Party @MadeInADay
Link Party Palooza @IHeartNaptime
Halloween Project Parade @OhMyCreative


