Using quick set concrete was right up my alley since I now have three stone look walkways made using the stuff.
 | |||
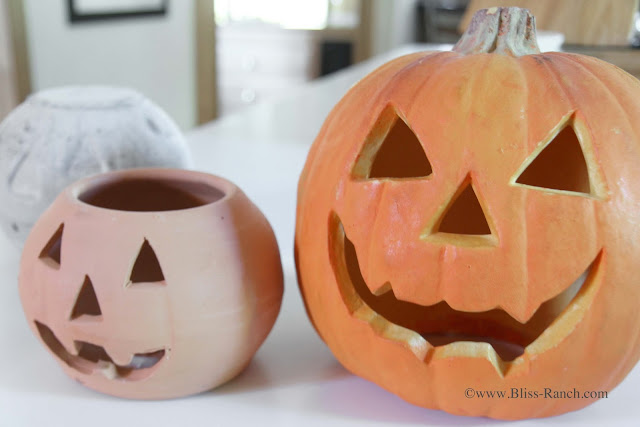
| Terracotta pumpkin, and thick foam light up pumpkin with his electrical gutted and removed |
The cement colored pumpkin on the far left was a test using a different technique with a regular plastic pumpkin. It came out smooth and I wanted them to be crumbly looking like the ones Shayna made.
With detailed steps as well as some tips I learned along the way, you can be morphing your own plastic pails into a concrete patch of jack-o-lanterns.
The idea is to start with a hollow pumpkin mold of some kind - ceramic, plastic, whatever - and fill it with quick set cement, let it harden for a couple days, and release the pumpkins into the wild.
You have to seal the eyes, nose and mouth so the cement doesn't ooze out.
I used plastic wrap and white duct tape on the foam one, and just the white duct tape on the terracotta one.
The instructions were to spray the inside with cooking spray, which I only did on one because I forgot, and I was glad I forgot - more on that under tips.
As you can see I have three plastic pails, one terracotta and one foam pumpkin. All picked up from garage sales for free or .25¢. I won't pay any more than that, because those pail ones are only a buck at the Dollar Store 'ya know!
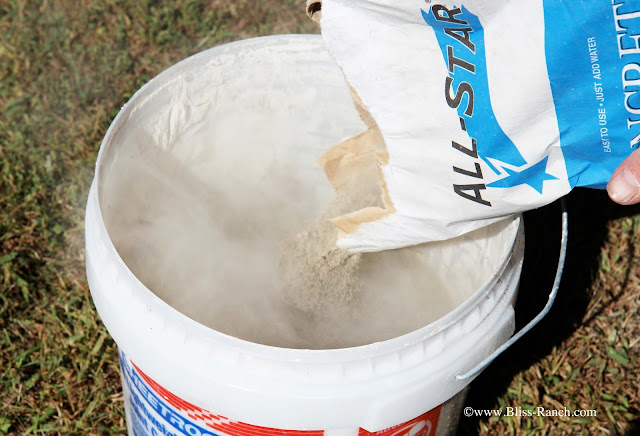
Mix up your quick set cement in a bucket.
Add water till you get a thick consistency, not as thick as peanut butter, and not as runny as... as... ummm, I don't know, not as runny as something runny, but still pour-able.
Mix it with what ever you have.
I have a man with a mixer on a drill, so I used that technique.
He also had a plastic McDonalds cup in his truck so I used that as a scoop.
I'm lovin' it.
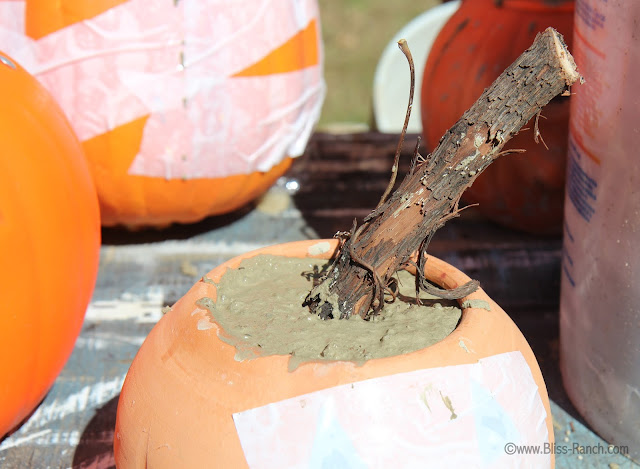
Pour the cement into the pumpkin molds.
Add stems if you want, and I wanted - on the ones that had an open top.
Above, the pumpkin on the right was an attempt to see how one would turn out if the plastic pail face features were reversed - sticking out.
The end result was not flattering for that one.
The little guy above was fun to crack open.
I hatched a pumpkin baby! But I knocked off his eyes and nose in the process, so had to glue them back on.
I hatched a pumpkin baby! But I knocked off his eyes and nose in the process, so had to glue them back on.
Above is a flat top - no stem - the one from the foam pumpkin. He would be good to use as a pedestal with a plate of treats on top.
Pail face from a pumpkin pail.
Shayna's pumpkins are a'la natural, and I love 'em, but I wanted mine to have some shading to make them primitive looking since I already have a lot of concrete around.
 |
| Rit Dye Experimental Labratory |
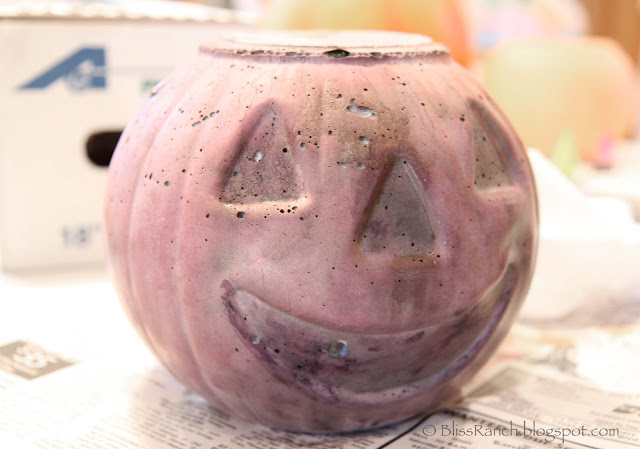
This knowledge also saved me from having a patch of pink pumpkins.
 |
| NOT a Rit Dyed Pumpkin |
Nope. It didn't. He's pink. Or maybe it's a she?
Due to unforeseen circumstances regarding one of the plastic pumpkin molds, I ended up with two test subjects.
Yes that is a pumpkin on the left. From Mars.
You can see the difference between the Rit Dye (left), and the orange food coloring on the right.
If I wanted the pumpkins to have a rustic primitive look, pink wasn't gonna work.
I purchased black and orange Rit Dye, then I started experimenting by mixing the colors.
Mixing the colors gave them various shades of a burnt orange and the dye reacted different on each pumpkin giving off the the final look.
As you can see, the little feller in the back isn't pink anymore.
I put a concrete sealer on them and that reacted with the Rit Dye yet again to give them another look.
You can't be set on what your finished project will look like using Rit Dye on cement, because you just don't know!
They will also fade in the sun.
The nice thing about these pumpkins is they don't have to be gutted, they won't rot and I can leave them out if the snow flies early.
The bad thing is I can't make a pie out of them.
I intend to make some more now that I understand the process and the Rit Dye.
I will probably send the one that looks alien out into the woods to crumble and decay, never to be seen again.
I don't think rotting cement will hurt his looks any.
Another favorite Ranch Halloween project next time; Haunted Halloween Portraits
Tips:
Don't spray the
inside of the pumpkins if you are going to use any color on them. The
cooking spray acts like a water barrier and you will need to give your
pumpkin a bath to wash off his oil. I didn't
spray more than one and nothing stuck on the inside, so I don't know if it's really
needed or not, could depend on what sort of pumpkins you start out with
as a mold.Tips:
I used only the quick set concrete. The original recipe called for some perlite and sphagnum peat moss. I didn't have any but I think it would give them a more primitive look which would be cool.
The other tip I have is actually for any made from the plastic pails.....the instructions called for clipping or cutting the pumpkins out of their shell all the way around. If you make one nice slice from top to bottom with a razor blade you can take the pumpkin out and use the mold again. All you need to do is duct tape the one slice back together and it's good to make another one.
Subscribe, Bliss Ranch arrives magically!
|


These are way cool. And I love the sticks poking out of their brains. And you could totally make a pie with them. Then we could all end up with witchy snaggleteeth!
ReplyDelete-andi
super cool techinique. I love the fact that they will last forever. how heavy are those things? I guess when you are done using them for the season you can use them as kettle bells.
ReplyDeleteNow don't be putting them on your trail of terror path where a visitor can break a toe when he/she runs into one when trying to get away from the crazy corn lady!!
ReplyDeleteI think you're onto something. My pumpkins usually freeze within the first week, so I've been using the faux variety. The kids can't tell the difference, but it's getting expensive to replace my faux pumpkins they smash on the street! Just let them try to lift a concrete pumpkin!
Put the odd one in the garden. Leaves will ground around it and no one will know his/her oddities.
ReplyDeleteBrenda
I think these are very cool! And it's funny about Debbie Doo and Rit Dye. She should work for them (or they for her!).
ReplyDeleteJane xx
Those turned out so cute! I love the two stacked on top of each other. I also like the idea of dying them and using a stick for a stem.
ReplyDeletelove, love, love your pumpkins, even the one from MARS! LOL
ReplyDeletegreat tutorial, super tips, thanks for sharing!!
if this is linked to Catch as Catch Can, it would be "caught" just sayin' ;)
Great Tutorial! I have a plastic purple pumpkin in my trunk for this very project...though I probably won't get to it until next year! Awesome! I love the RIT dye for coloring!
ReplyDeleteBrooke
I thought I'd seen it all in the pumpkin department but leave it to you to try something new! Great tips and I love that look -- sorta whimsical-wonky-wonderful. :)
ReplyDeletexo Heidi
Cool!
ReplyDeleteHow adorable, Bliss! But, I bet they are heavy as heck. LOL
ReplyDeleteI am lovin this! Definitely my kind of project! I have to say the alien one gave me the creeps... that one on the left is so cute!
ReplyDeleteLooks like so much fun to crack open the pumpkins when they're done!!
ReplyDeleteI love this, they really do look scary...but in a good way!
ReplyDeleteThese are all really cool...and I really want to make some!
ReplyDeleteI love these pumpkins so much!! You crack me up..but you may be right about me, not sure:) LOL!!
ReplyDeleteCool pumpkins you can bring out year after year. I'm not feeling much into carving them anymore and concrete is a great look.
ReplyDelete