 | |||
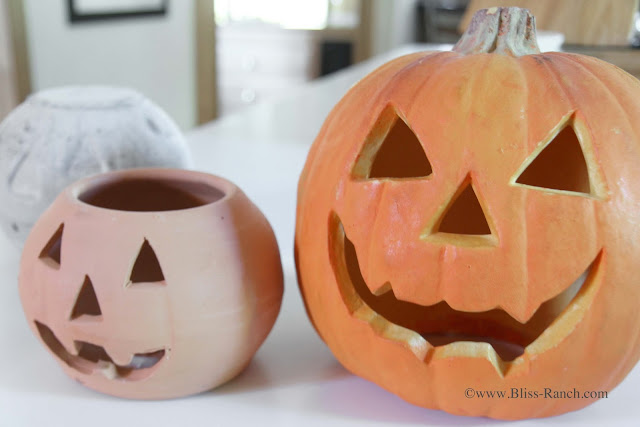
| Terracotta pumpkin, and thick foam light up pumpkin with his electrical removed |
These are my first victims. The idea is to use hollow pumpkin shapes as a mold and pour the quick set concrete inside, let it harden for a couple days, and release the pumpkins into the wild. The pumpkin on the far left was a test using a different technique with a regular plastic pumpkin. It came out smooth and I wanted them to be crumbly looking like the ones Shayna made.
You have to seal the eyes, nose and mouth so the cement doesn't ooze out. I used plastic wrap and white duct tape on the foam one, and just the white duct tape on the terracotta one. The instructions were to spray the inside with cooking spray, which I only did on one because I forgot, and I was glad - more on that under tips.
As you can see I have three plastic pails, one terracotta and one foam pumpkin. All picked up from garage sales for free or .25¢. No more than that, because those pail ones are only a buck at the Dollar Store 'ya know!
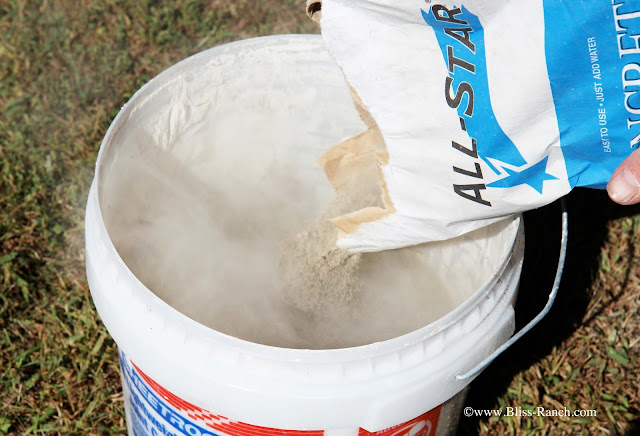
Mix up your quick set cement in a bucket, add water till you get a thick consistency, not as thick as peanut butter, and not as runny as... as... ummm, I don't know, not as runny as something runny, but still pourable.
Mix it with what ever you have.
I have a man with a mixer on a drill, so I used that technique.
He also had a plastic McDonalds cup in his truck so I used that too. I'm lovin' it.
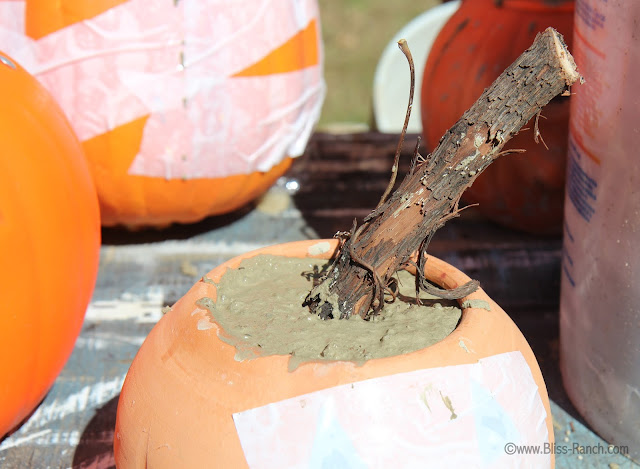
Pour the cement into the pumpkin molds.
Add stems if you want. I wanted too on the ones that had an open top.
The pumpkin on the right was an attempt to see how it would turn out if the plastic pail face features were reversed - sticking out. The end result was not flattering for that one.
This little guy was fun to crack open. I hatched a pumpkin baby!
But I knocked off his eyes and nose, so had to glue them back on.
This is a flat top, the one from the foam pumpkin.
Pail face from a pumpkin pail.
All of the ones shown are before I used a top secret coloring recipe on them. Shayna's pumpkins are a'la natural, and I love 'em, but I wanted mine to have some shading to make them sort of primitive looking since I already have a lot of concrete around.
Tips:
Don't spray the inside of the pumpkins if you are going to use any color on them. The cooking spray acts like a water barrier and you will need to give your pumpkin a bath to wash off his oil. Now that I think about it, I didn't spray more than one and nothing stuck, so I don't know if it's really needed or not, could depend on what sort of pumpkins you start out with as a mold.I used only the quick set concrete. The original recipe called for some perlite and sphagnum peat moss. I didn't have any and I'm not sure if that is good or bad.
The other tip I have is actually for any made from the plastic pails.....the instructions called for clipping or cutting the pumpkins out of their shell all the way around. If you make one nice slice from top to bottom with a razor blade you can take the pumpkin out and use the mold again. All you need to do is duct tape the one slice back together and it's good to make another one.
Subscribe, Bliss Ranch arrives magically!
|


I went to check, but I guess she didn't want to post at about 1 am, looking great so far !
ReplyDeleteWhat a great idea, I'm going to have a look at them now.
ReplyDeleteWow...you have a man with a mixer on a drill and a McDonald's cup?? Lucky girl! Your pumpkins look pretty cool and I'm off to check them out.
ReplyDeleteWell, those pumpkins are not going to blow away in the wind! Pretty cool idea!
ReplyDeleteAre you still barefootin' it way down south? I've taken my winter jacket out of storage.
Looking very awesome so far, I'm intrigued and I love those branch handles. Off to check them out!!
ReplyDeleteYou're such a tease. Heading over to Debbie's!
ReplyDeleteThis project is awesome, Bliss...visited Debbie for the dye tutorial, too! Thanks!
ReplyDeleteYou are such a tease!!! Heading over to Miss Debbiedoos now to check them out ...
ReplyDelete:) Linda
I'm lovin' it, too! Heading over to Debbie's now.
ReplyDeleteGreat project. I love how they all turned out, even the alien one.
ReplyDeleteHow cute! I love the little sticks you used in yours. Isn't it fun to get ideas off someone's blog and be able to replicate yourself? Yours turned out great. Now, everyone who comes to your house will ask where you got them. LOL! (They'll be bummed that they have to be handmade.)
ReplyDeleteWell, Bliss you have done a great job with those and love the look of the dye. I even like the one Clarie said you should take to the woods and shoot. I poured some on Thursday and wish I had thought to put a stem in them. I had stems gathered up but forgot about it. Mine are still curing, so don't know how they will turn out. Thanks for the ideas of dye and stems.
ReplyDeleteAudrey Z. @ Timeless Treasures
These are really cute. You did a great job on them. Love the dyed ones.
ReplyDeleteI am your newest follower.
Judy
So much fun!
ReplyDeleteI am loving it too, and your pumpkins were much more low in fat, even with the cooking spray.
ReplyDeleteThey are adorable Bliss! You "rock" !! :)
ReplyDeleteSusan
What a great idea! Love them!
ReplyDeleteHeading over to see them now! I can't wait to see how they came out!
ReplyDeletewhat a cool idea. they turned out super cool. now to go check out the rest!
ReplyDeleteThat's..... genius.
ReplyDeleteTotally rocking the crete Bliss,and the Rit! LOVES it.
ReplyDeleteYou tease :). I can't wait to see your super secret pumpkin coloring tips.
ReplyDeleteI LOVE these - one more use for an ugly plastic pumpkin! And I love top secrets - do we have a secret handshake and a code name?
ReplyDeleteKelly
Bliss you did a fantastic job! I am loving these big time.
ReplyDeleteCynthia
This is all too cool. I'm afraid if I tried this I would put Phil's head in the pumpkin before I added the cement....
ReplyDeleteI'm intrigued about this top secret coloring method! off to check it out!
ReplyDeleteThis has to be the coolest thing I've ever seen. I want to use concrete.
ReplyDeleteLove them! Keeps bad kids from throwing your pumpkins....unless they're strong bad kids I guess....but in general, a deterrent! Going to find out the secret now......
ReplyDelete