Everything from little kids chalking on hopscotch squares and spilling their bubble blowing soap mixture, to bikes and foot traffic.
And then there were those couple years of duck doo from the crapping quackers.
The walkway and porch started out getting a fresh coat of sealer seasonally - usually in the Spring - and in it's first years of life it looked wonderful, but 20 years later not so much.
From time to time the exposed aggregate also received an acid wash to clean things off, like rust stains from hard water dripping when the hose was left leaking.
But when repeated rough winters caused a long crack in the walkway and some sinking, it was time to give the walk an affordable fix that would revive it.
The walkway flows into a tar driveway and has an area of river rock landscape that separates where it forks off to a mudroom entry.
Year after year all those areas started to take on the same gray color creating a sea of blah.
Replacing a long walkway and pouring a new cement porch wasn't in the budget, even with a brother who is a mason, so we decided to try something ourselves to fix the cracked area and update the look.
If it didn't work, we would be back at square one which was replace it all and empty our wallet.
I can't guarantee what worked for us will work for you so if you have little or no experience with cement or using concrete stains you should ask professionals.
The concrete stains have to penetrate, so depending on what products have been on your cement, it might not even work.
According to the internet, it shouldn't have worked on ours so take that for what it's worth.
And to clarify, our walk way is exposed aggregate so there is already lots of color variation from the pea rock.
First the old cracked part was removed, and the chunks will be recycled as stepping stones that lead to the hut where our duck Clementine resides.
Now the duck will have her own walkway to mess up.
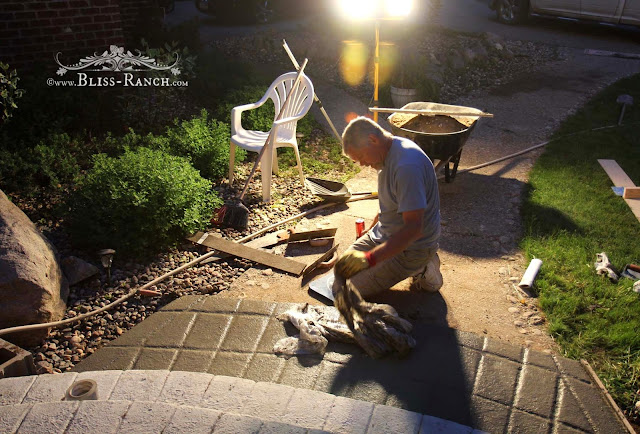
The new area was formed - shorter steps for those of us without the stride of a 6 foot two man.
Brawn hand formed the cement into a faux paver look.
The wider lower step had to go out as far as the big crack, which was a bonus if you ask me..... space to set flowers that need more sun than the shaded porch provides.
Working into the night, plastic was used and stamped on to give the cement texture, which would not only give it the rustic look we wanted but keep it from being slippery.
We wanted the whole porch and walk to look refreshed not necessarily new, so the new parts needed to look like they had been there for a while, not brand spanking new, which meant perfection wasn't on the list.
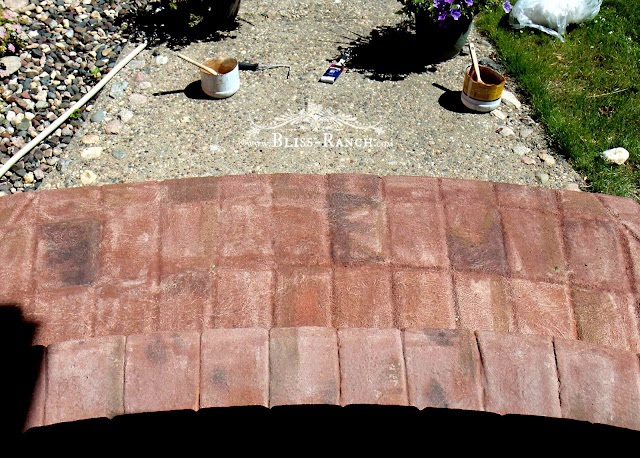
I was already liking the new shorter stride of the steps when they were just basic gray concrete but for everything to blend together and imperfections to look intended, the final phase of adding the concrete stains needed to be done.
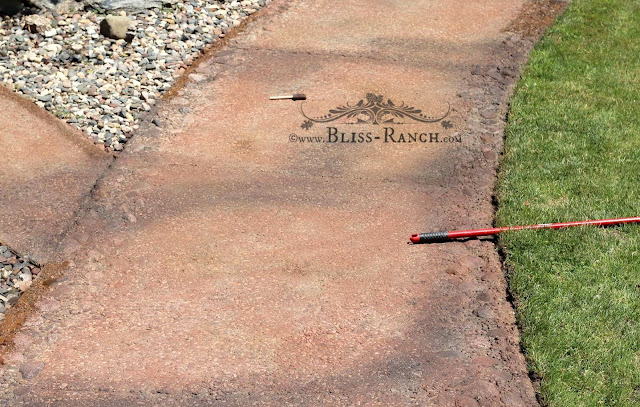
The walkway has larger stones embedded along the sides, and the colors of the concrete stains were chosen to mimic the shades in the rocks as well as compliment the brick on the house. Red, beige, black, gray, and a mixture of it all.
Brawn had a little system he used for adding the color, which was basically just go for it!
A combination of paint brushes, foam pads and a sprayer were used, adding and mixing all the stain colors as he went so each area has a variation of shades and tones.
The contrast to the driveway and the landscape rock was noticeable right away.
For the larger areas he sprayed on the colors that would be the unifying background, then went back and highlighted areas with the other colors, for example accentuating each large slab where they are separated, in a darker shade.
He also would rub some stain back off of the rocks along the side so some of their natural look showed.
Once the sealer is rolled on it brings out the colors, ties it all together and tones down the brightness of the more intense stain colors.
If you look at the before photo below, you can see the new look now highlights the walk and steps, and the surrounding rock landscape looks much nicer with the contrast. That will be most noticeable in early spring before the shrubs are full.
The sealer is just rolled on. It comes in a big metal bucket purchased at a concrete place and it's pricey stuff, but it brings out the colors and gives it a really nice finished look.
No photos of the sealing, because Moi had it all over her hands and could not touch the camera.
Last Fall we cut all the shrubs down to just a few inches high so they wouldn't hang over onto the walkway like they had been. I'm amazed at how they grew right back up and filled in. That solar light on the right is now covered by the spirea, guess I should move it.
The front door mat was also updated, you can see the color refresh with paint {here}.
We think the whole entry refresh now gives guests a warm welcome.
The Boston Ferns by the front door were brought in over winter. I wanted to see if I could keep them alive and use them again in Spring. As you see I was able to do that.
Now lets see if I can keep them alive for another summer!
Subscribe, Bliss Ranch arrives magically!
|


I love the outcome! Your post is very informative and am filing it away for a future project to tie our entry with our walkway which was redone last year. Those faux pavers Brawn did are amazing!
ReplyDeleteOooh love!! I think I'd definitely need a professional or a Brawn for this job at my place. Do you loan him out?
ReplyDeleteBrawn did an awesome job on this! It looks gorgeous! Great job!
ReplyDeleteJudy
Wow, you guys are unstoppable at any task. This looks like the work of a seasoned mason. Really, really nice. Congratulations, and I bet you saved thou$and$.
ReplyDeleteWay to go, Brawn! It looks like it's always been that way. We have real slate, which gets slippery and dangerous, so I am thinking about changing it out to something less deadly. This would be a great choice.
ReplyDeleteYou two are one hellofa team. Honestly, there's NOTHING you can't do! Love the bricks...brilliant idea to use the plastic. Good luck with the ferns, I'm having all I can do to keep ONE geranium alive.
ReplyDeleteWhat a great job! You guys really do some wonderful projects!
ReplyDeleteWOWZA! Y'all did a terrific job! Makes you proud to finish a big job like that, doesn't it? And your re-done welcome mat looks perfect -- icing on the cake!
ReplyDeleteThat is amazing Bliss! And it's so nice to see Braun in action. I thought for a while there you might have been making him up.
ReplyDelete-andi
That looks great! I love a nice entryway to the house. I'm sure that was a lot of work, but now you can enjoy it before the snow covers it up this Winter!
ReplyDeleteTotally awesome look! Such a great job.Having a great entryway is important. You rocked it! I would love if you shared with our readers today at Dishing It & Digging It link party, live at 4:00 EST.
ReplyDeleteOh my gosh Bliss! This is amazing! Brawn outdid himself on this project. I have some concrete work I need to so this fall and I can't figure out exactly how I want it done. I have thought about hiring it out, but will probably DIY it. I sure hope I can do as good a job.
ReplyDeleteLove that the concrete looks like bricks/pavers. Beautiful!
gail
Wow, just wow. Did you say his brother is a masonry? I think you meant Brawn. No really this is so cool. I can't believe how real they look...
ReplyDelete